
Here’s the quick guide to install SSL certificate on Microsoft IIS 7
To successfully complete the SSL Installation process, you’ll need to first install the intermediate certificate(s) before configuring your primary SSL certificate on your IIS machine.
Step 1: Download and Install SSL Certificate Files
Once the validation process is completed from the issuing Certificate Authority, we will send your SSL certificate via email in a *.zip file. Download that *.zip file and extract all on the directory where you wish to store your certificate files. In this *.zip file, you will have the primacy SSL certificate, intermediate certificate and root certificate file. As for the corresponding private key, this file will be already stored on your IIS machine since it was made during the CSR generation process.
Step 2: Intermediate SSL Certificate Installation on IIS 7
1) Click Run from Start menu or press ‘Windows + R’ key
2) In Run, type MMC and then press Enter
3) Microsoft Management Console(MMC) dialog will appear
4) Under the File menu click Add/Remove Snap-in…
5) Click the Add button and the Add Standalone Snap-in dialog will appear
6) Now select the Certificates option and press Add.
7) Certificates is been added in Snap-in, press OK.
8) Expand the Certificates option and Right-click the Intermediate Certification Authorities
9) Hover your mouse over All Tasks and click on Import.
10) Certificate Import Wizard will appear, press Next
11) Browse for the Intermediate certificate file you have saved in your directory and then press Next
12) Now select Place all certificates in the following store, click over Browse button and select Intermediate Certification Authorities, press OK and hit next button. (If Intermediate Certification Authoritiesis already selected then move to next step.)
13) Next window will display the certificate information you have imported.
14) Press the Finish button, import was successful alert will be display, press OK.
15) Close the console 1 and press No to remove the console
Step 3: Primary SSL Certificate Installation on IIS 7
1) From control Panel on your windows, open Administrative Tools and open Internet Information Services (IIS) Manager.
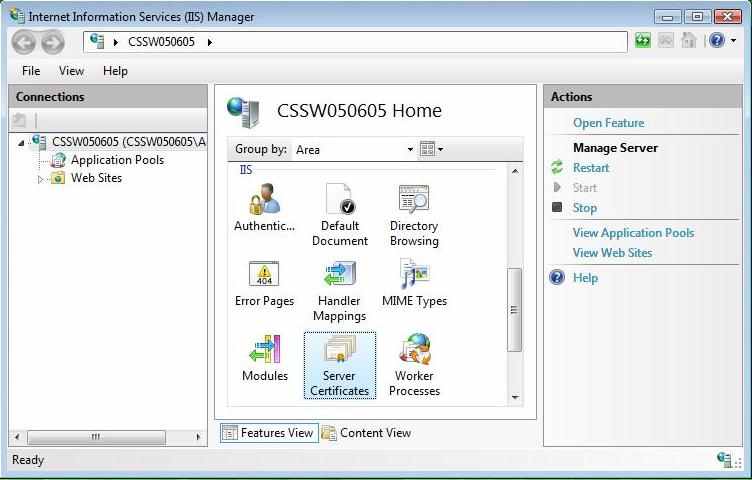
2) Here in IIS Manager window, select your Server
3) Now scroll down to bottom side and double-click on Server Certificates.
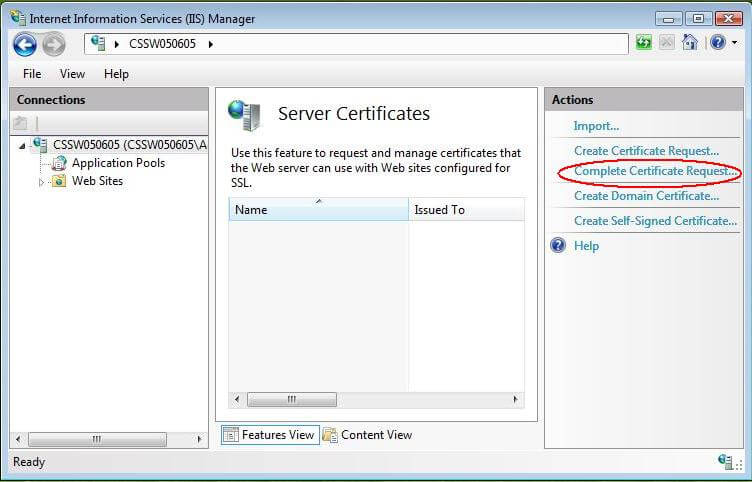
4) Select ’Complete Certificate Request….’ option from the Actions panel in right.
5) Now click over …. to locate the certificate file
6) In the Open dialog box, browse for your certificate file, click on it and press Open
7) Now give a new common name to the certificate file in the Complete Certificate Request dialog and press
8) Select the server name where you wish to secure install your certificate in IIS Manager
9) Expand the Sites and click over the site which you wish to secure.
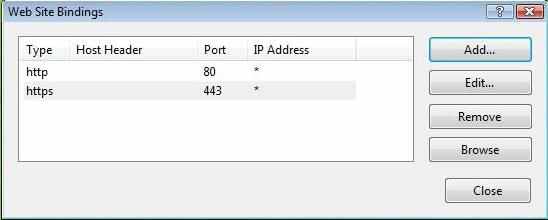
10) Click over Bindings… in the Action panel and then click over Add…
11) Add Site Binding dialog will appear, here:
(i) Select HTTPS for Type
(ii) Select All Unassigned for IP Address
(iii) Keep Port as 443
(iv) Select the SSL certificate which you have just installed for SSL Certificate option and then press OK.
12) Now close the Bindings window and then close IIS Manager as well.
Your SSL certificate & Intermediate certificate are now installed.
Important Resources
Related Posts
- Install SSL Certificate on Microsoft IIS 5 & IIS 6
- Install SSL Certificate on Microsoft IIS 8
- Create CSR and Install SSL on Microsoft Server 2016 with IIS 10 & 10.5
- How to Install an SSL Certificate on Microsoft Office 365
- Install SSL Certificate on Microsoft Azure for an Application
SSL Certificate for Microsoft IIS
Comodo UCC SSL and GeoTrust True BusienssID Multi-Domain SSL Certificate are Microsoft recommended SSL that can secure your website on Microsoft IIS Server.


