
A step-by-step guide on installing an SSL Certificate on MS Office 365

Quick Steps to Install an SSL Certificate on Microsoft Office 365 using IIS 8/8.5
- Open the ZIP file containing your SSL certificate and save the SSL certificate file (yourdomainname.cer) to the desk top of your AD FS server.
- Open Internet Information Services Manager.Click “Start,” then type and select “Internet Information Services Manager.”
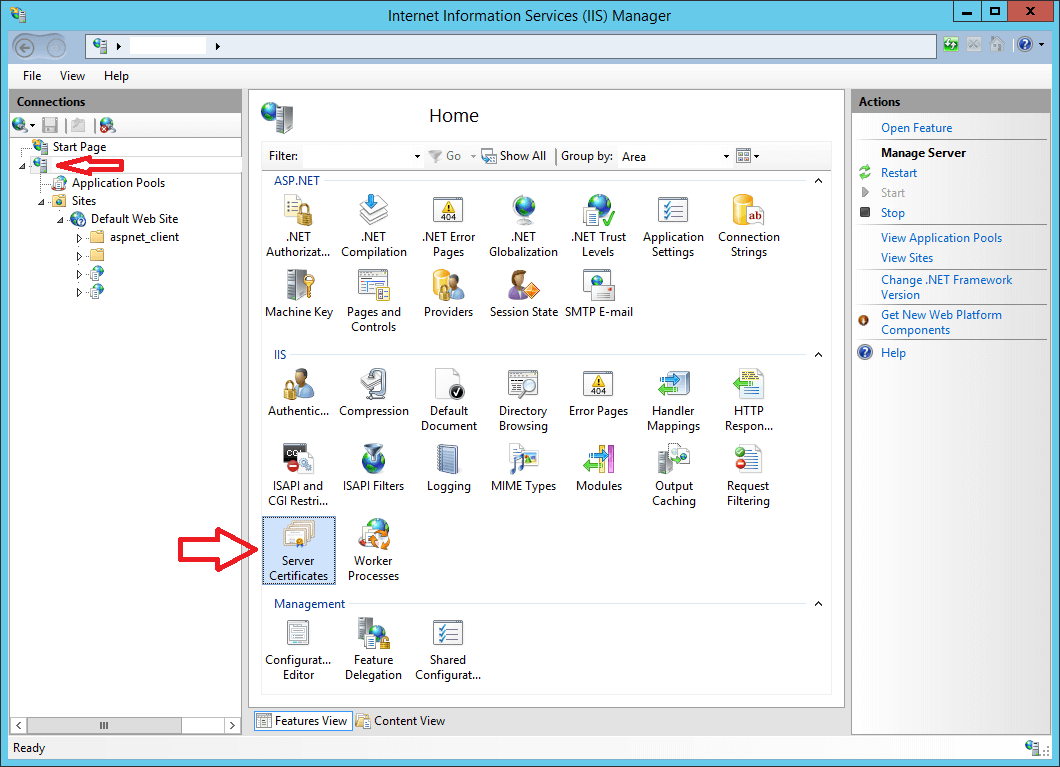
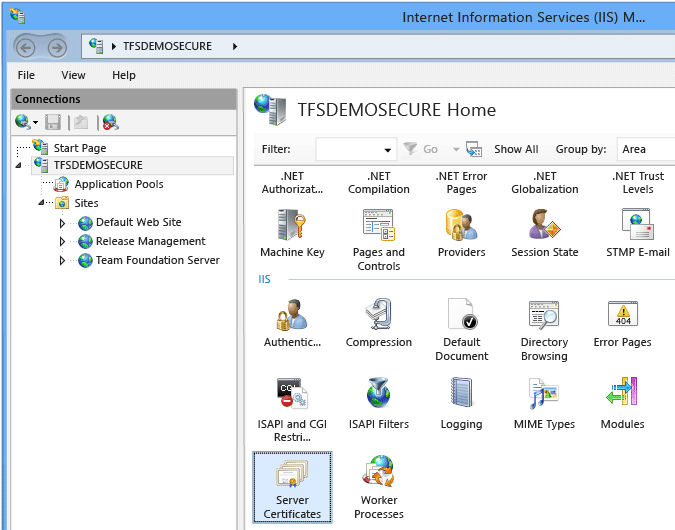
- In IIS Manager, under “Connections,” select your server’s hostname.
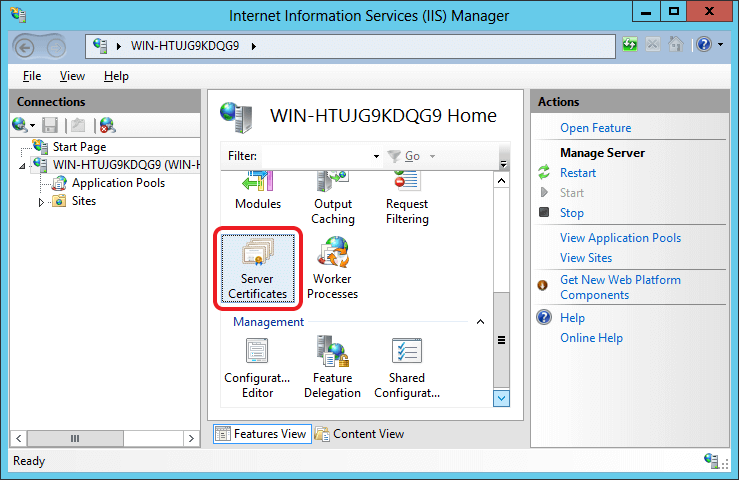
- Under IIS, double-click the “Server Certificates” icon.
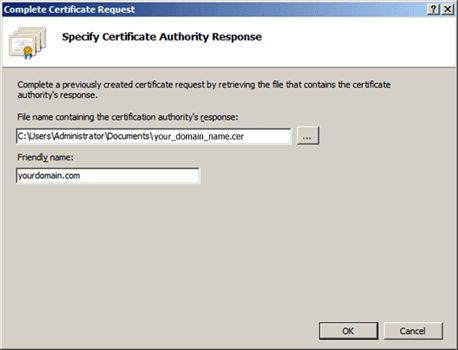
- In the Actions menu, click “Complete Certificate Request” to open the “Complete Request Certificate” wizard.
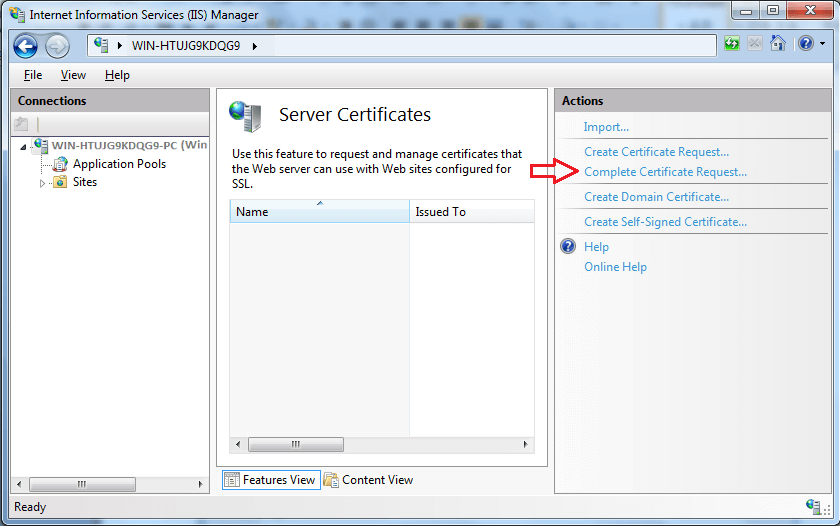
- In the wizard, on the “Specify Certificate Authority Response” page, in the “File name containing the certification authority’s response” field, click “…” and find the .cer file that the CA sent you.

- In the “friendly name” field, enter a name for the certificate to be known by.
Note: This name is not part of the certificate. - In the “Select a certificate store for the new certificate” drop-down, select “Personal.”
- Click “OK.”
You still need to use IIS to assign the certificate to the default website (HTTPS port 443).
Using IIS 8/8.5 to Assign the Certificate to the Default Website
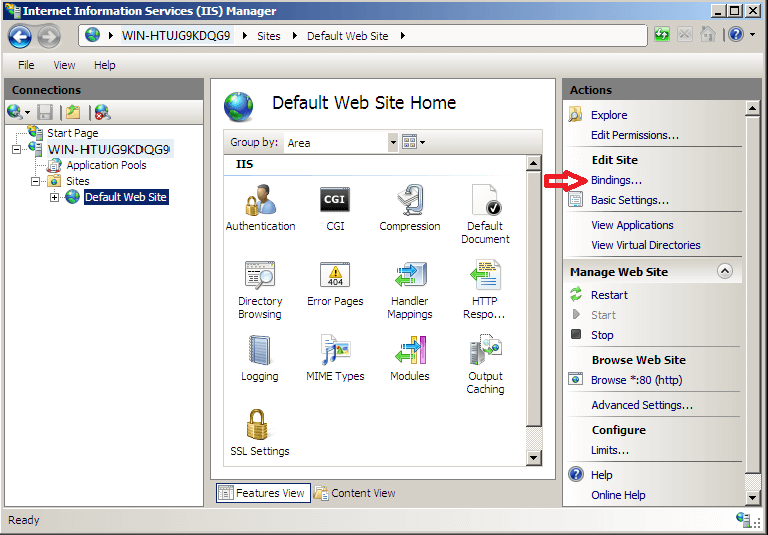
- In IIS Manager, under “Connections” select your server’s name, select “Sites,” select the “Default Website.”
- In “Actions,” under “Edit Site,” select “Bindings.”
- Click “Add.”
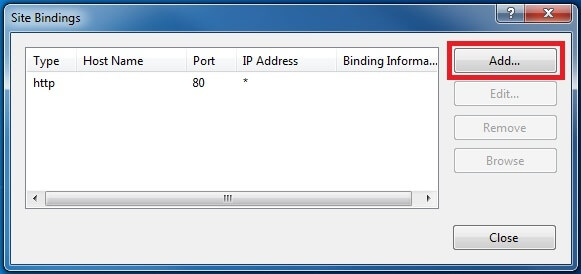
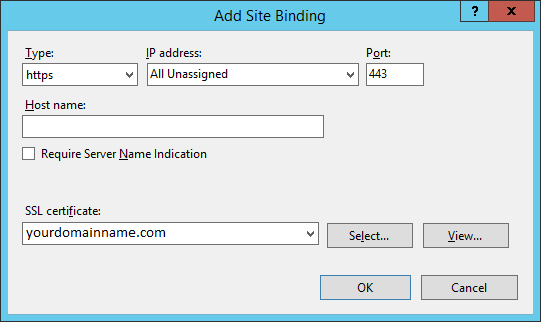
- In the “Add Site Bindings” window, select the following information and select “OK.”
Type: HTTPS
IP Address: All Unassigned
Port: 443
SSL Certificate: Select the “friendly name” of the certificate you just installed.
Congratulations! Your certificate has now been installed properly!
How to Install your SSL Certificate Using IIS 7
- Open the ZIP file containing your SSL certificate and save the SSL certificate file (yourdomainname.cer) to the desk top of your AD FS server.
- Open Internet Information Services Manager.Click “Start,” then type and select “Internet Information Services Manager.”
- In IIS Manager, under “Connections,” select your server’s hostname
- Under IIS, double-click the “Server Certificates” icon.
- In the Actions menu, click “Complete Certificate Request” to open the “Complete Request Certificate” wizard.
- In the wizard, on the “Specify Certificate Authority Response” page, in the “File name containing the certification authority’s response” field, click “…” and find the .cer file that the CA sent you.
- In the “friendly name” field, enter a name for the certificate to be known by.
Note: This name is not part of the certificate. - Click “OK.”
Using IIS 7 to Assign the Certificate to the Default Website
- In IIS Manager, under “Connections” select your server’s name, select “Sites,” select the “Default Website.”
- In “Actions,” under “Edit Site,” select “Bindings.”
- Click “Add.”
- In the “Add Site Bindings” window, select the following information and select “OK.”
Type: HTTPS
IP Address: All Unassigned
Port: 443
SSL Certificate: Select the “friendly name” of the certificate you just installed.
Congratulations! Your certificate has now been installed properly!
Important Resources
Related Posts
- Install SSL Certificate on Microsoft Azure
- Install SSL Certificate on Microsoft IIS 5 & IIS 6
- Install SSL Certificate on Microsoft IIS 7
- Install SSL Certificate on Microsoft IIS 8
- Create CSR and Install SSL on Microsoft Server 2016 with IIS 10 & 10.5
Microsoft Exchange Server SSL Certificates
Get Exchange SSL Certificates for as low as prices with unlimited server licenses, re-issuance, free trust seal, 99.99% browsers compatibility, and more. Buy now!
Shop UCC SSL Certificates
Shop SAN SSL Certificates


