Quickly Force HTTPS Redirection After Installing SSL by Editing the .htaccess File
An SSL/TLS certificate is no longer an option… it’s mandatory to have it installed on your WordPress website to prevent the dreaded “Not Secure” warning.
Suppose you’ve hosted your website on managed web-hosting. You may likely have never come across redirection issues because it automatically loads your site on HTTPS once the SSL is installed. In other words, site visitors can view your website from HTTP to HTTPS once the SSL is installed.
For instance: https://www.domainexample.com/
However, sometimes, HTTP to HTTPS is not redirected automatically, maybe because your hosting provider is not supporting it or due to another reason. But, if your website is hosted on an Apache server, you can tweak the .htaccess file for redirecting your WordPress website from an insecure HTTP connection to a secure HTTPS connection.
Here’s How to Redirect HTTP to HTTPS to Serve Your Site Securely
The code below forces any given HTTP request to be rewritten and changed to a secure HTTPS connection. For instance, the code below will force http://domainexample.com to load securely on an HTTPS connection as https://domainexample.com.
RewriteEngine On

RewriteCond %{HTTPS} !=on

RewriteRule ^(.*)$ https://%{HTTP_HOST}%{REQUEST_URI} [L,R=301,NE]

Header always set Content-Security-Policy "upgrade-insecure-requests;"
Likewise, the code mentioned above will also force directly linked resources such as CSS, images, etc., to use HTTPS. However, if the above code isn’t working, then you’ll need to verify line endings. For instance, copy/paste from web browser to text editor may fail to pass correctly. So, once you copy and paste the above code into your text editor, you should verify and delete each line break.
Forcing HTTPS Connection by Editing .htaccess File of Your WordPress Site
Although you’ve installed an SSL/TLS certificate into your WordPress website, user can sometimes end up landing on the HTTP-based website if you haven’t done the redirection. So, you’re required to force an HTTP request to be redirected to HTTPS.
There are two different types of code options that you can use. For instance, if the first one doesn’t work, you can go for the second option.
Option 1:
RewriteEngine On

RewriteCond %{HTTPS} !=on

RewriteRule ^(.*)$ https://%{HTTP_HOST}%{REQUEST_URI} [L,R=301,NE]

Header always set Content-Security-Policy "upgrade-insecure-requests;"
Example That Includes Default WordPress Code
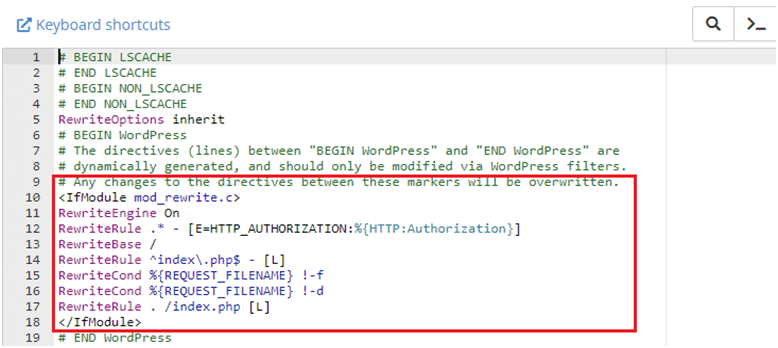
Below is the .htaccess file code along with the new code that forces a HTTPS connection:
RewriteEngine On

RewriteCond %{HTTPS} !=on

RewriteRule ^(.*)$ https://%{HTTP_HOST}%{REQUEST_URI} [L,R=301,NE]

Header always set Content-Security-Policy "upgrade-insecure-requests;"

# BEGIN WordPress

# The directives (lines) between `BEGIN WordPress` and `END WordPress` are

# dynamically generated, and should only be modified via WordPress filters.

# Any changes to the directives between these markers will be overwritten.

<IfModule mod_rewrite.c>

RewriteEngine On

RewriteBase /

RewriteRule ^index\.php$ - [L]

RewriteCond %{REQUEST_FILENAME} !-f

RewriteCond %{REQUEST_FILENAME} !-d

RewriteRule . /index.php [L]

</IfModule>

# END WordPress
Option 2:
It’s another option. However, before moving forward, make sure you change exampledomain.com to your actual domain name.
RewriteEngine On

RewriteCond %{SERVER_PORT} 80

RewriteRule ^(.*)$ https://www.exampledomain.com/$1 [R=301,L,NE]

Header always set Content-Security-Policy "upgrade-insecure-requests;"
Full Example That Includes Default WordPress Code
Here’s the code for .htaccess file:
RewriteEngine On

RewriteCond %{SERVER_PORT} 80

RewriteRule ^(.*)$ https://www.exampledomain.com/$1 [R=301,L,NE]

Header always set Content-Security-Policy "upgrade-insecure-requests;"
# BEGIN WordPress
# The directives (lines) between `BEGIN WordPress` and `END WordPress` are
# dynamically generated, and should only be modified via WordPress filters.
# Any changes to the directives between these markers will be overwritten.
<IfModule mod_rewrite.c>
RewriteEngine On
RewriteBase /
RewriteRule ^index\.php$ – [L]
RewriteCond %{REQUEST_FILENAME} !-f
RewriteCond %{REQUEST_FILENAME} !-d
RewriteRule . /index.php [L]
</IfModule>
# END WordPress
Once you copy and paste the code mentioned above from any of the given options, your website should start redirecting to HTTPS. However, sometimes you may encounter mixed content warnings and there could be different reasons why that would occur. So, after forcing an HTTPS connection, if you may face this mixed content error instead of it redirecting to HTTPS, it’s most likely that it’ll be solved and redirected to HTTPS once you resolve the mixed content warning.
What’s the .htaccess File?
The .htaccess File is one type of configuration file that’s used by the Apache server. It’s capable of overriding different settings of server configurations, and it’s often used for cache control, website optimization, URL rewriting, and authorization.
Here Are the Different Ways to Edit the .htaccess File in Your WordPress Website
There are three different ways to edit the .htaccess file within WordPress, and they’re as below:
- Editing the .htaccess file through cPanel
- Editing the .htaccess file through FTP Client
- Editing the .htaccess file through a WordPress plugin
Editing the .htaccess File Through cPanel
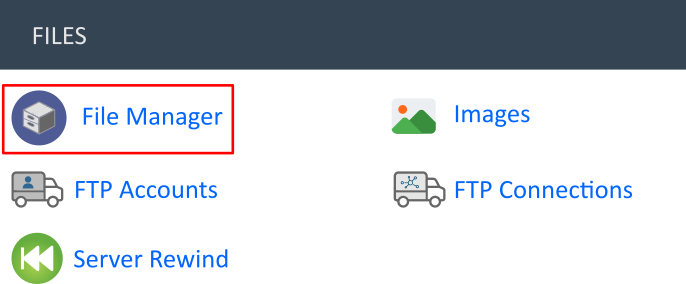
Login to your hosting account. Go to cPanel, and from the “Files” section, select “File Manager”
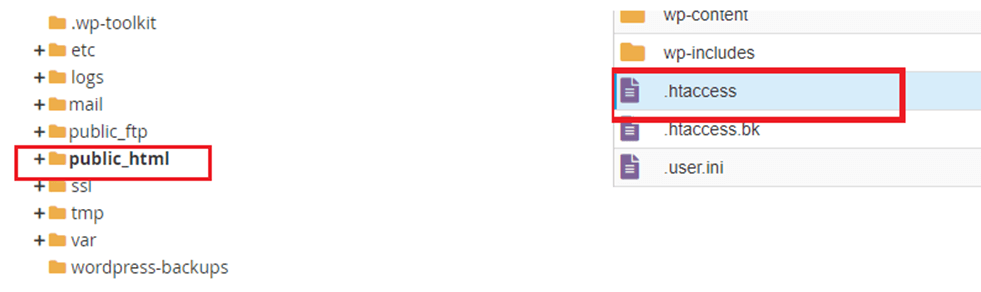
Once you get into File Manager, select and open the public_html folder where the .htaccess file is located.
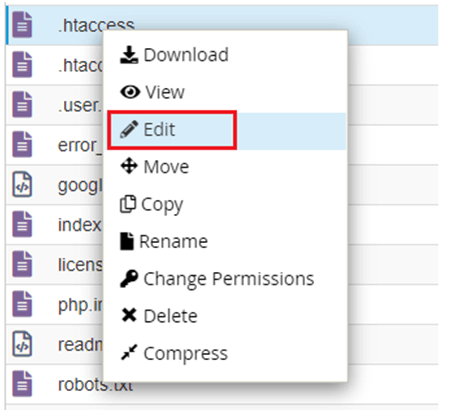
Once you select the .htaccess file, right-click on it and select the Edit option.
It’ll ask if you want to continue with Editing. If yes, then it’s recommended to first take a proper backup using any backup tool – such as CodeGuard Backup or any other.
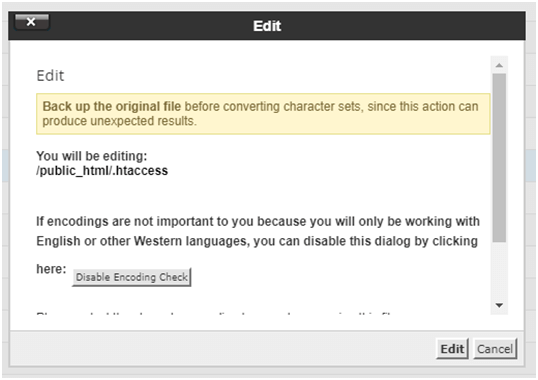
Click on it, and it’ll open the .htaccess File like below:
Now, you can go ahead and insert the code mentioned earlier.
Editing the .htaccess File Through an FTP Client
Another way to edit the .htaccess file is through the FTP client. If you aren’t aware of what an FTP client is, it’s an easy-to-use tool that connects the website to your computer. Using an FTP Client tool such as FileZilla, you can access your website files, including the .htaccess file, through your local computer.
Download and Install FileZilla
After installing, open FileZilla, and then you’ll need to connect it to your website. For connecting, you’ll need FTP credentials which can be provided by your website hosting provider. The FTP credentials include hostname, username, password, and port number.

FileZilla has options for all four things. Once you insert your FTP credentials, click on the button “Quickconnect,” and the software will connect with your site.
Find & Edit the .htaccess File
FileZilla is divided into two different sections. The left side has the local website that shows different files from your local computer. The right side includes your website remotely while showing different files of your website.
From the right side through the remote site, select the folder named public_html. Once you open it, all the folder’s content will appear in the File name section located under the Remote site section.
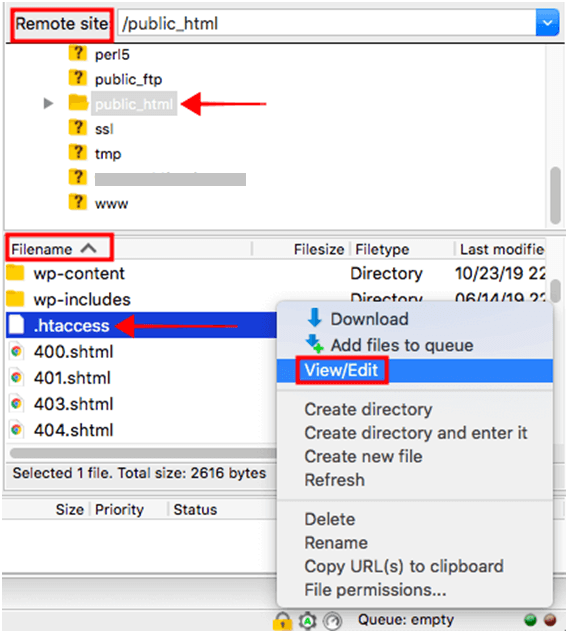
Now, select the .htaccess File and right-click on it. From the menu, select View/Edit and insert the code. Then, save it.
Editing the .htaccess File Through a WordPress Plugin
Suppose you aren’t experienced enough to handle the backend of the website. In that case, it’s recommended you avoid going with the two steps mentioned above and instead go for the easier one of doing it using a WordPress plugin.
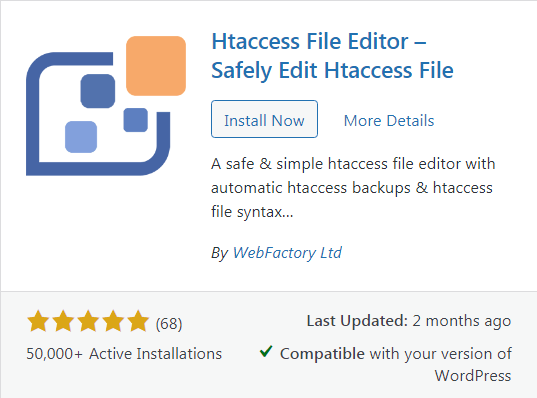
Editing the .htaccess file using a WordPress plugin is the easiest and safest method. For instance, from the WordPress repository, you can consider choosing a plugin like Htaccess Editor or any other .htaccess file editing plugin with good ratings and installation numbers.
However, even after installing the plugin, we recommend you first try it on your staging website because many times, the installed plugin isn’t compatible and creates issues. Therefore, by first trying it on the staging site, you’ll prevent issues on your live website. For example, other plugins can stop working or the site may not work correctly in other ways, and in that case, if it’s done on the staging site, then your live site will stay unaffected.
Using Htaccess Editor Plugin as an Example
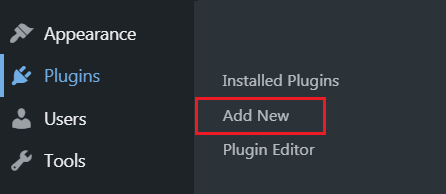
Go to the plugin and select Add New.
Search for the Htaccess Editor Plugin and install & activate it.
After installing and activating it, from the dashboard, go to Settings >> WP Htaccess Editor. And then, enter the code snippet:
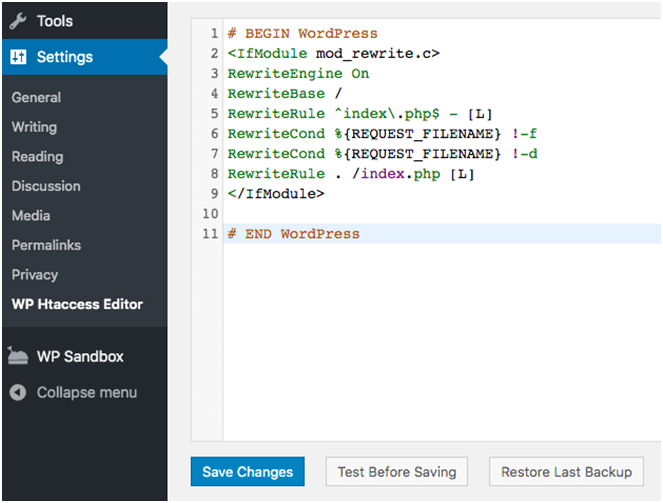
Now save the changes and verify if the changes have taken place.
WordPress SSL Certificates
Protect your WordPress website in minutes with WordPress SSL Certificate. It includes 256 bit encryption, $10K-$50K warranties, daily WordPress scanner, site seal and more.
Wrapping Up
After installing your SSL/TLS certificate, sometimes, a redirection issue arises. Therefore, you’re required to edit the .htaccess File and add code that forces you to load the website on HTTPS. Here we’ve mentioned different steps on how to edit the .htaccess file and insert the code.
But, before you begin adding the code to force your website to load on HTTPS, it’s recommended that you take a proper backup. That way, you don’t lose any critical data or files if anything goes wrong!