FileZilla is one of the most popular FTP clients that supports secure connections through FTPS (FTP Secure). This guide will walk you through the detailed process of installing an SSL certificate on FileZilla Server.
This guide outlines several methods for integrating your X.509 certificate and private key with FileZilla Server, allowing you to select the approach that best fits your requirements.
Uploading a Certificate
Method 1.
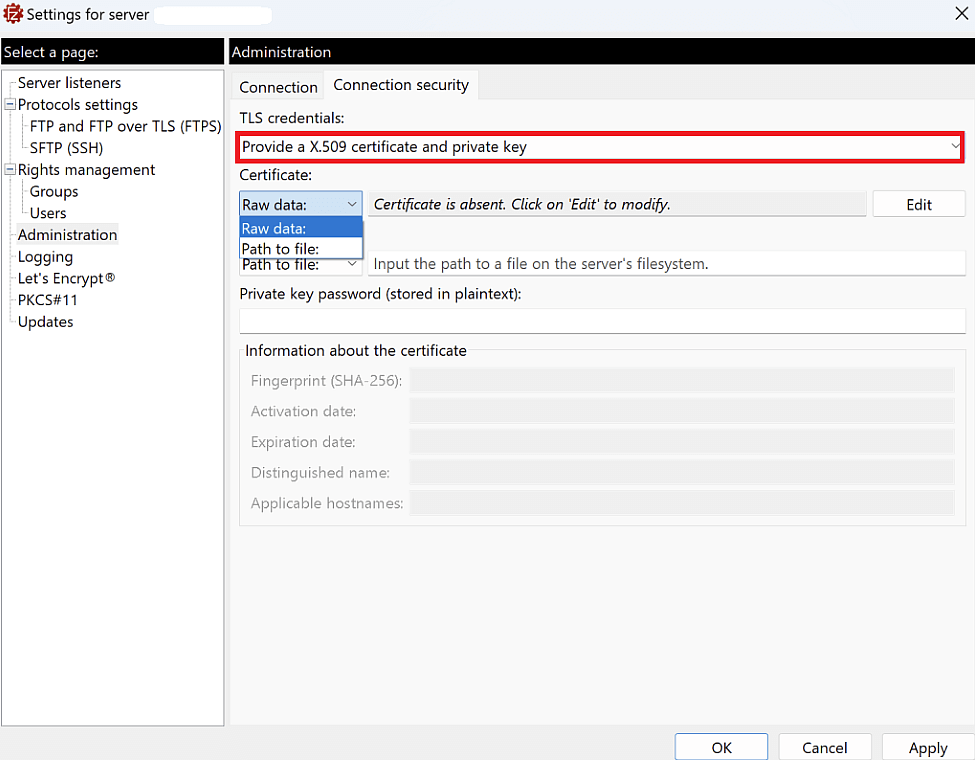
File Path: Enter the full path to the PEM format file that contains your certificate and CA-bundle. Ensure that this file is stored on the server. This method is suitable when the X.509 certificate and key files are managed outside the FileZilla Server.

Method 2.
Raw Data: You can input the certificate in PEM format by either typing it directly into the field or by selecting a local file from the machine running the Administration interface.
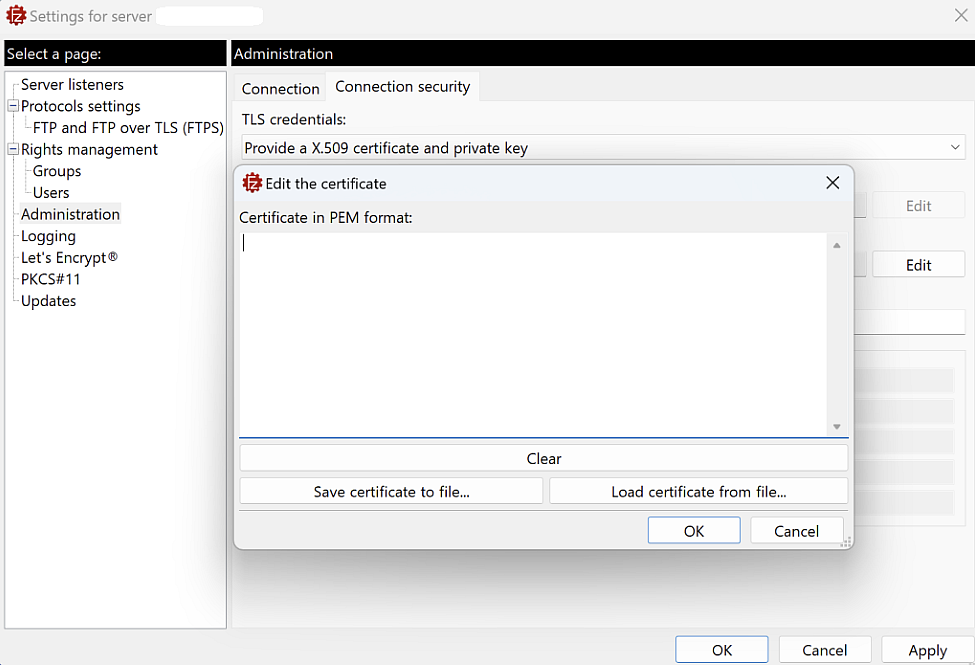
To proceed, click on the Edit button, where you can either paste the certificate or load it from a file.
Please note: Within the Edit dialog, you have the option to save the loaded certificate to a local file.
Uploading a Private Key
Method 1.
File Path: Enter the full path to the PEM file containing your private key in the Private Key field. Be aware that sometimes, both the private key and certificate chain may be included in a single file, in such cases, use the same file path in both fields. The file must be on the server.
Method 2.
Raw Data: You can enter the private key in PEM format by either typing it directly or selecting a local file from the machine where the Administration interface is operating.

Method 3.
PKCS#11 URL: Input the PKCS#11 URL that indicates where your private key is located. This URL should point to the specific location of your private key within a Hardware Security Module (HSM) or other storage device.

Please note: To apply a newly selected certificate, click either the Apply or OK button at the bottom of the settings dialog.
Conclusion:
Installing an SSL certificate on FileZilla Server is essential for secure file transfers and protecting sensitive data. By following the steps described above, you can easily enable SSL/TLS.
In case you have any questions, you can always contact our Support Team and refer to the official FileZilla documentation.