The easy as ABC-123 — your step-by-step process to getting an SSL certificate reissued
Sometimes in life, stuff happens. And the world of HTTPS is no different. There are times when you will need to reissue your SSL certificate. This means that something has happened over the course of the certificate’s lifespan that has caused a need for it to be replaced.
Some of the reasons why you would need to reissue an SSL certificate include:
- Your private key becoming lost/deleted/compromised
- You’re changing servers
- Updates within the cybersecurity industry altering circumstances
- Adding or removing Subject Alternative Name (SAN) domains
- Organizational changes changing the details from your original SSL purchase
- Outage or bug affecting your current certificate
If you need to reissue your SSL certificate, you’re in luck. Most SSL certificate providers will reissue a new SSL certificate to you for free (and not just once but for the entire lifespan of the certificate). The process of reissuing an SSL certificate will likely feel familiar because the steps are similar to those for purchasing/obtaining a new SSL certificate.
What You Need to Know Before You Start
Just like the original SSL certificate installation process, the first thing you need to do is get a certificate signing request (CSR). There are two ways to go about this:
- Get Your Original CSR — Go into your web hosting dashboard. Then, go into your TLS/SSL Manager section. You’ll find your original CSR in there.
- Create a New One (RECOMMENDED) — We recommend going into your TLS/SSL Manager and to generate a new CSR. Your public and private keys are created during the CSR process. Therefore, this will be a safer route. Especially if you’re getting an SSL certificate reissued due to your private key being compromised.
If you need a refresher on the process for generating a new CSR, this is a helpful article. This resource is segmented by various web hosting providers to provide you with platform-specific, step-by-step directions.
Reissue SSL Step 1 — Click on “My Account” and Log In

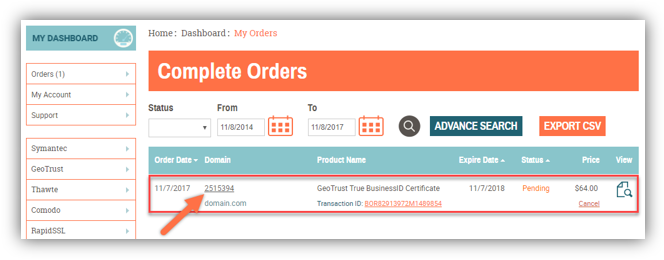
Reissue SSL Step 2 — Select “My Orders”

Reissue SSL Step 3 — Find the Certificate You Want to Reissue and Click on the Order Number
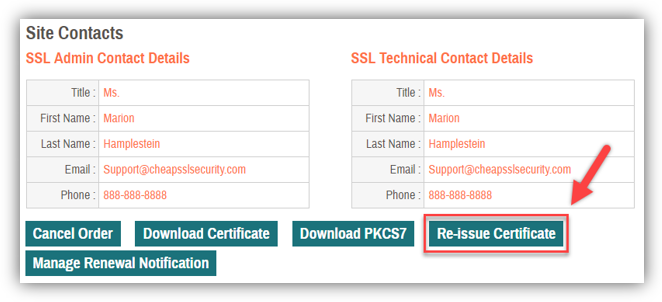
Reissue SSL Step 4 — Click on “Re-Issue Certificate” (found at the bottom of the page)
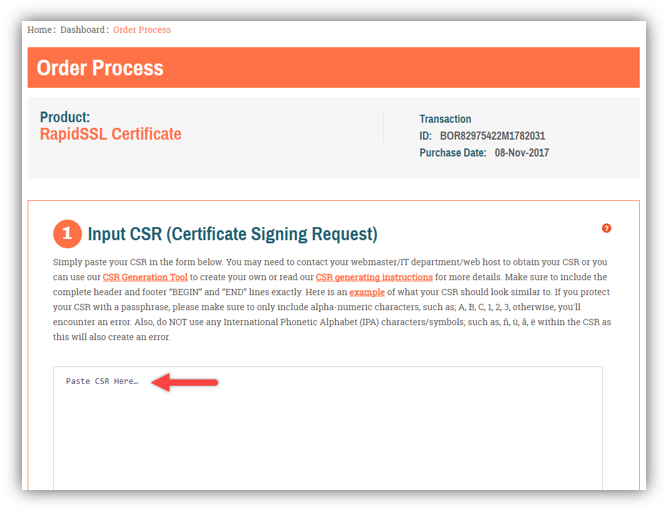
Reissue SSL Step 5 — Paste Your Original or New CSR into the “Input CSR” Text Box
Reissue SSL Step 6 — Server Type, Signature Algorithm and Domain Control Validation
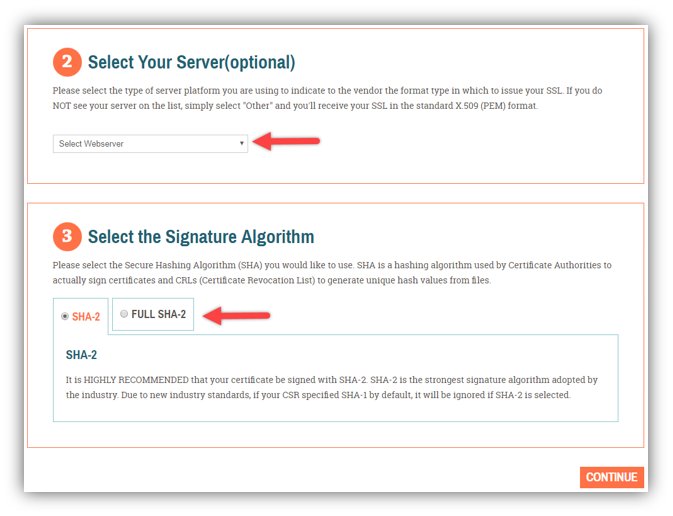
If you’re not sure of the server type, simply choose “other” when making your selection.
Note on Signature Algorithm: Both SHA-2 (FULL SHA-2) or SHA-2 with a SHA-1 root (SHA-2) should work as a selection due to the fact most devices have adopted the SHA-2 encryption.
Automated Authentication
If you want to make things as easy as possible, you can choose to authenticate ownership of your domain through email authentication. This option is not valid for extended validation (EV) SSL certificates. When you select this option, you will receive a confirmation email to the following email addresses:
- The email address listed on the WHOIS for the domain in question
- admin@<domain.com>
- administrator@<domain.com>
- hostmaster@<domain.com>
- postmaster@<domain.com>
- webmaster@<domain.com>
File Based Authentication
If email authentication isn’t for you, no worries. You can choose a file-based authentication method instead. This means you’ll need to upload a .txt file based on the hash values of your CSR to the root folder of your website if you choose this authentication method. You’ll receive the file once you submit the reissue SSL form, and you’ll need to upload the file to the following specified path:
https://><domain.com>/.well-known/pki-validation/<MD5hash>.txt
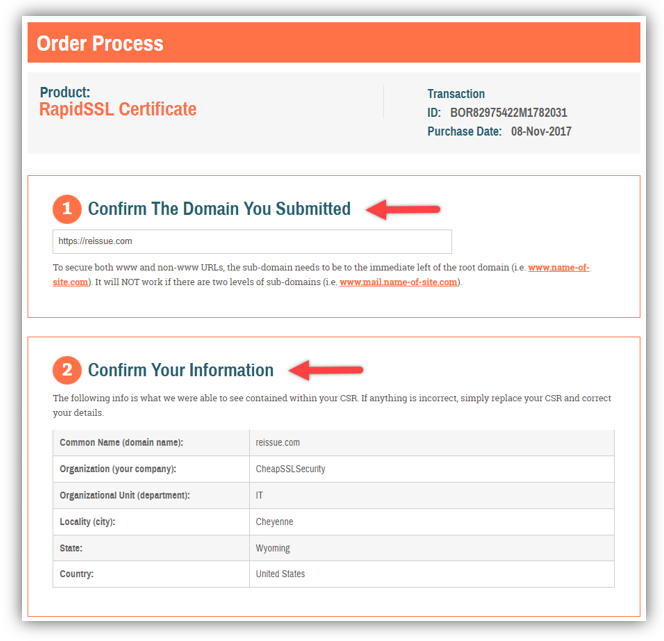
Reissue SSL Step 7 — Verify Your Information
Reissue SSL Step 8 — Revalidate
Yes, you must go through the validation process again. Don’t worry, though — this typically goes quite quickly since you previously completed the process. If your original validation involved a final verification call, which is typically the case for an OV or EV SSL certificate, you will need to accept that call from the CA one more time. If you don’t receive the call within 24 hours, we recommend contacting our support team for assistance.
Congrats! You’ve completed your quest to reissue an SSL certificate. You can now install your new certificate.