
FileZilla Server SSL Installation Steps
After finishing the Pre-Installation steps, follow our step-by-step guide about SSL Certificate Installation on a FileZilla Server.
Step: 1
When you receive your SSL certificate via email, store the yourdomainname.zip file on your server, and extract these two files: “yourdomianname.crt” & “certificateauthority.crt” in the same folder.
Step:2
Open the FileZilla Server Options window and click on Edit >> Settings.
Step:3
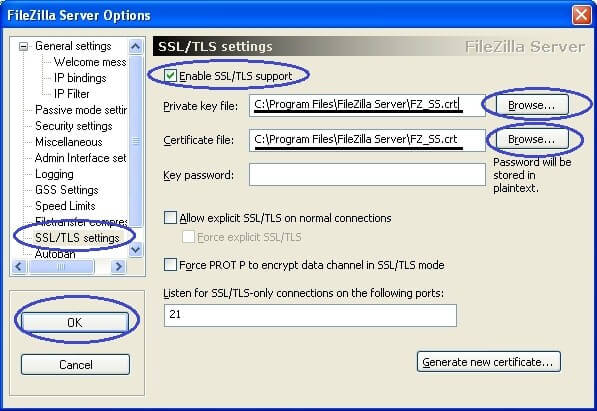
On the left side, select the SSL/TLS Setting option.
Step:4
Check the “Enable SSL/TLS support” option under SSL/TLS Settings.
Step:5
There are three options under where you checked Enable SSL/TLS support:
- Private key File box: Click on the Browse button and choose Private Key location which you have created earlier.
Example: C:\Program Files\FileZilla Server\yourdomainname.crt
- Certificate File box: Click on the Browse Button and select the location of your certificate file that contains the intermediate certificate and server certificate.
Example: C:\Program Files\FileZilla Server\certificatefile.crt
- Key Password box: Enter the Key Password which will be stored in plaintext.
Step: 6
Once you finished above process, click on the OK button.
Step: 7
Restart the FileZilla Server.
Your Certificate is now successfully installed on the FileZilla Server.
Important Resources
SSL Certificate for Zimbra
![]() Zimbra server only accepts SSL Certificate from a genuine and trusted SSL Certificate Authority. Buy trusted SSL Certificate from at a cheap price with heavy discount rates.
Zimbra server only accepts SSL Certificate from a genuine and trusted SSL Certificate Authority. Buy trusted SSL Certificate from at a cheap price with heavy discount rates.


