
Can’t wait to launch your latest application? Learn how properly signing executables helps you secure your organization’s most valuable assets in just four easy steps
A few decades ago, building customer trust was much easier for a business thanks to face-to-face interaction. Today, in an increasingly remote world — one that relies heavily on codes where software has become part of our life — it’s another story.
Many organizations have shifted their business online. But how can you foster your customers’ trust now if you’re one of them? You can do this by signing your executables and applications. In fact, 66% of organizations dramatically increased the number of code signing certificates they used in 2021.
In a recent article, you learned everything about how code signing works as a process. In this second part of the series, you’ll learn how to sign executables and applications in four easy-to-follow steps. Are you ready to give a digital identity to your software and increase your customers’ trust? Read on to discover how.
How to Sign an Application or an Executable in 4 Easy Steps
Code signing enables developers and software manufacturers to digitally sign their executables and scripts. In addition to attaching their digital identities to their code, this process also allows them to offer assurances that:
- The software is really coming from them, and
- It hasn’t been altered or corrupted since it was signed.
How do they do it? Many companies use a simple command line tool built by Microsoft: SignTool.
Now that you have your code signing certificate, let’s find out how to sign an exe using that tool. It’s dead simple, and it doesn’t take long to do. We’ve even summarized the whole process for you in the table below!
| How to Sign an Exe – 4 Steps to Follow | Overview of What This Step Entails |
| 1. Install Microsoft SignTool.exe | The tool can be downloaded together with Windows 10 SDK as it’s included in it. |
| 2. Open a Command Prompt Window as Administrator | Open the Windows Command Prompt tool by typing CMD into the Run window (or in the search bar next to the Start menu). |
| 3. Navigate to the Directory Containing SignTool.exe | Use the command: cd C:\Program Files (x86)\Windows Kits\10\bin\10.0.22000.0\x86 |
| 4. Sign and Timestamp Your Application or Executable | Use the command: signtool sign /f “c:\filepath\codesigningcertificate.pfx” /p “yourpasswordhere” /tr https://timestamp.digicert.com /td SHA256 /fd SHA256 “c:\filepath\myexecutable.exe” |
1. Install Microsoft SignTool.exe
The tool is included in Windows 10 software development kit (SDK) and should be already installed on your Windows 10 device. If it isn’t, ensure you install it before proceeding further.
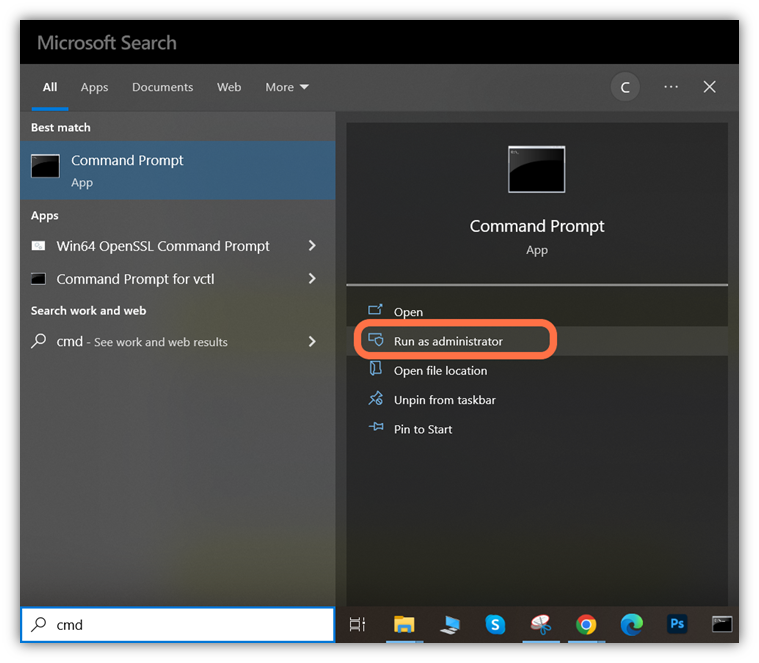
2. Open a Command Prompt Window as Administrator
- Click the Start button or press the Windows key to pull up the Start menu.
- Type cmd in the search or run bar to bring up the result for Windows Command Prompt.
- Right-click on the Command Prompt app and select the option that says Run as administrator. You’ll be requested to log in with your administrator credentials, so make sure you know them!
Important! Are you signing your code with an EV code signing certificate? Make sure the USB token sent to you from the issuing certificate authority (CA) is inserted into your device first. This hardware token delivery method will apply to OV code signing certificates as well starting Nov. 15, 2022 (Nov. 14 for users in North America).
3. Navigate to the Directory Containing SignTool.exe
Change to the directory where SignTool.exe is installed. Usually, it’s under Program Files, in a bin folder, but it really depends on where you’ve installed Windows SDK. The script below gives you an idea of how you can navigate to another directory in a standard installation:
cd C:\file_path\folder.When put into action, the command will look something like this:
cd C:\Program Files (x86)\Windows Kits\10\bin\10.0.22000.0\x86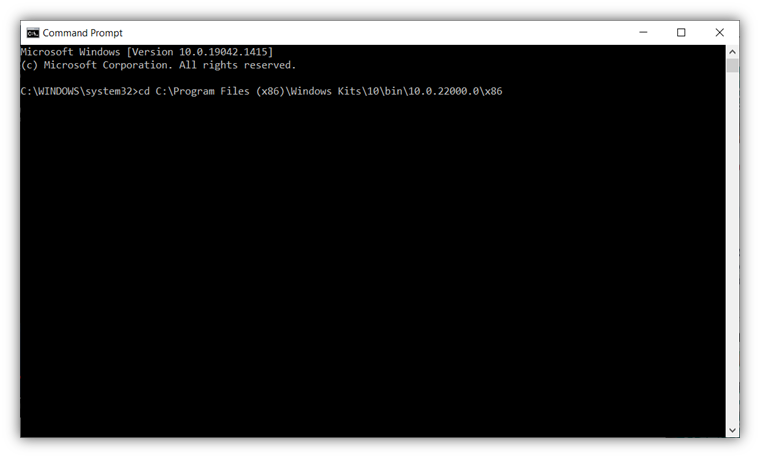
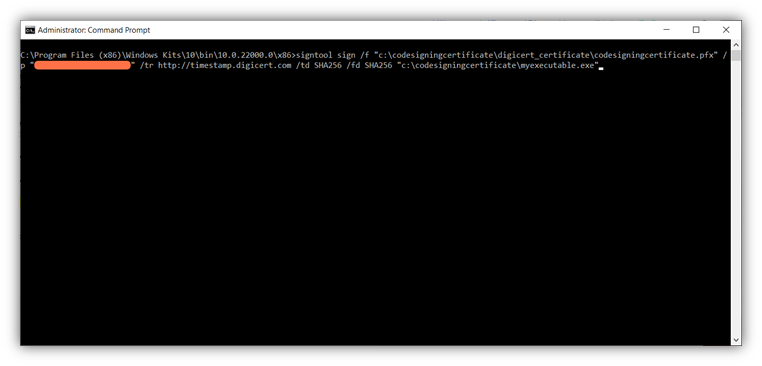
4. Sign and Timestamp Your Application or Executable
Sign your exe or application by using the following command:
signtool sign /f "c:\filepath\codesigningscertificate.pfx" /p “yourpasswordhere” /tr http://CAtimestampserver.com /td SHA256 /fd SHA256 "c:\filepath\myexecutable.exe" For demonstration purposes, we’ve used as an example the script used to sign a code using an existing DigiCert code signing certificate (we’ll use the customized versions of the commands in the screenshots):
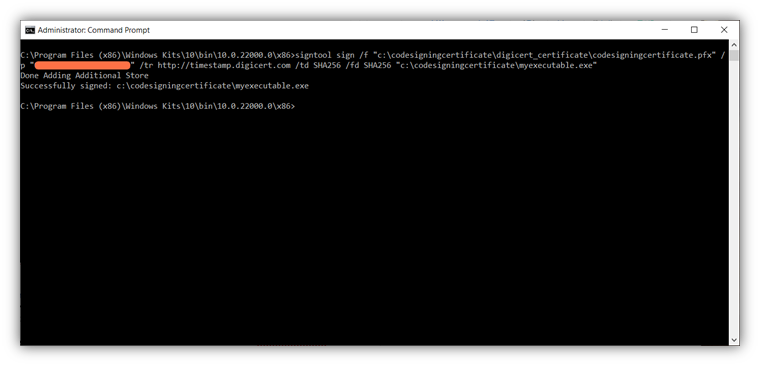
signtool sign /f "c:\codesigningcertificate\digicert_certificate\codesigningscertificate.pfx" /p “yourpasswordhere” /tr http://timestamp.digicert.com /td SHA256 /fd SHA256 "c:\codesigningcertificate\myexecutable.exe"Important! You’ll be prompted to enter your token password if you’re signing executables or apps with an EV code signing certificate. Once again, starting Nov. 15, 2022, the same password will also be required for OV code signing certificate users due to the move to secure storage on hardware security tokens.
Et voila’! You’re done. This is how to sign an application or an exe using Microsoft SignTool. That was quick, wasn’t it? At this point, you’ll want to double-check whether the digital signature has been applied successfully to the application or executable before making it available to customers and end users.
Do you need to do this even if the command prompt windows just showed you a message stating that the application has been successfully signed? Yes. Because like journalists often say, “If your mother says she loves you, check it out.” How? Let’s find it out!
How to Verify Your Signature in Microsoft SignTool
Nothing is perfect — and glitches and errors can happen to virtually every developer at one point or another. But when the security of your codes, organization, customers, and users are at stake, errors and glitches are things that you simply can’t afford. Call me paranoid, but as a cybersecurity professional, I’ve learned to always apply the motto, “I’ll believe it when I see it.” And this case makes no exception.
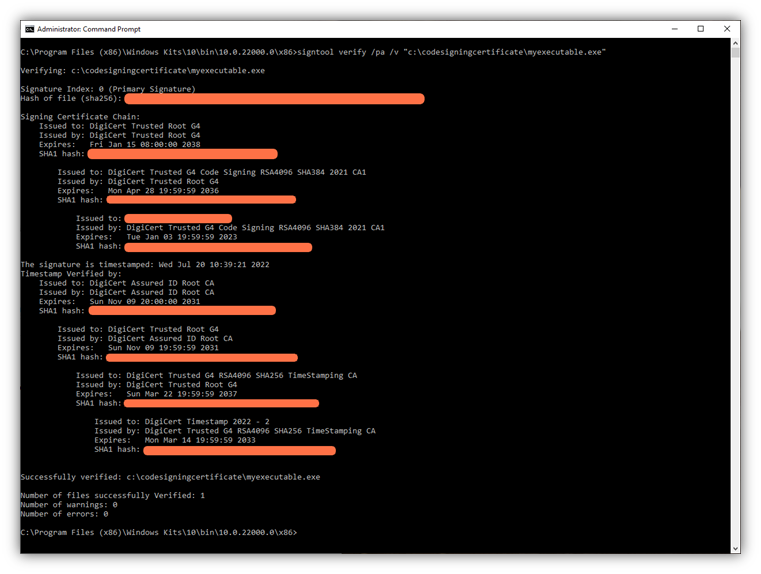
Use the following command to verify the success of your code signing signature process:
signtool verify /pa /v “c:\filepath\myexecutable.exe” Once you click enter, if everything went as planned, you should view the details of your code signing. This information should include info relating to the signing certificate used and the time it was officially stamped.
Did you know that your customers and users can also check this very information? They can do this simply by:
- Right-clicking on the icon of the signed executable or application.
- Selecting properties.
- Click on the Digital Signatures tab.
Isn’t it cool?
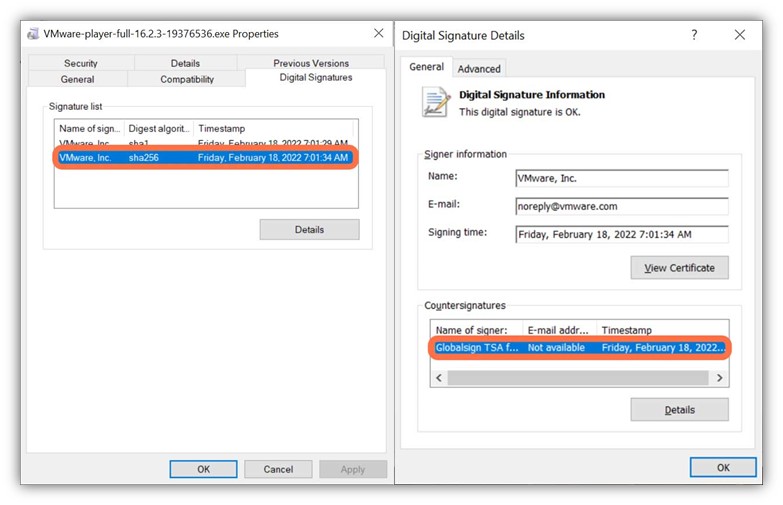
Image caption: This image shows what everyone downloading your signed executable or application will be able to see.
Microsoft SignTool Options
When I started signing executables with Microsoft SignTool, I didn’t know this small command line tool had also some awesome options. The following ones are my favorite:
- /d. It enables you to add a description to your executable or application. I find it very useful when I want to make the difference between the released version and the test one (e.g., /d “test code”).
- /du. With this one, you can add a specific URL to your executable or application description. I often used it when I wanted to add a link to the code’s project page or to any detailed information related to the signed code (e.g., /du https://your_Confluence_page.tld/project/description).
But there are more that can also be pretty useful. In fact, if you go back and check the script we used as the example on how to sign the executable, you’ll be able to recognize some of them:
- /a. In business, every second counts. Therefore you may want to automate as many tasks as possible. By adding this option to your script, the best code signing certificate will be automatically selected for you from those available in your Windows Certificate Store.
- /fd. This command lets you specify the file digest algorithm you want to use to create your signature file. At the time of writing this article, the recommended hashing algorithm is SHA256 (e.g., /fd SHA256).
- /n. Do you have multiple code signing certificates and want to select a specific code signing certificate? You may want to use this option rather than a/ followed by the certificate’s common name (e.g., /n “your code signing certificate common name”).
- /tr. As we already know, time stamping is important. This option will enable you to specify an RFC 3161-compliant trusted time stamp server.
Isn’t it sweet? These are just a few examples of all the numerous options you can use when signing executables with this little but grand command line tool.
Final Thoughts on How to Sign an Exe or Application
Have you ever thought that the process for signing executables was so straightforward? Four easy steps, that’s all that it takes.
Install Microsoft SignTool, open a command prompt, get to the right directory and run the script to sign your executable. Doing this, you’ll:
- Add an extra layer of security to your application’s installation process.
- Prove that your application is legitimate (i.e., it’s authentic because you’re the one who signed it).
- Guarantee the integrity of your application (i.e., users and operating systems will know no one has tampered with it since you signed it).
Give a real boost to your customers’ trust and increase the number of downloads. And remember, even one unsigned (therefore unprotected) executable or application can cause a widespread security incident.


